

CONNECT AND LOGIN TO SPA303 WEB-BASED CONFIGURATION INTERFACE:

- Connect your SPA303 with Internet, using its Ethernet port marked SW. Once connected, press the Setup button then press 9 to review your Network and Current IP.
- Go to the SPA303 web interface by entering the above IP address into your Web Browser.
- By default, you will land on and view the "Info" page, in "Basic" view. Click on "Admin login" at upper right and enter admin/admin for username/password.
- Once logged in as admin, click on "advanced" at upper right to get to the advanced view. And click on the Phone tab.
PHONE SETTINGS:
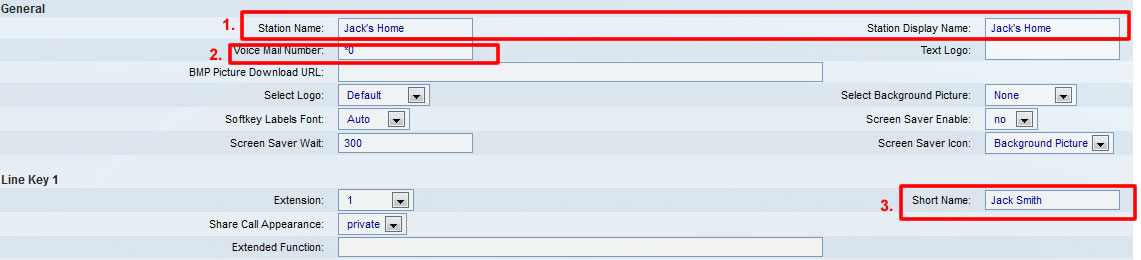
Under "General"
- Station Name & Station Display Name = Name to identify the station; appears on the LCD screen on phone models that have a display. You can use spaces in this field and the name does not have to be unique. If both the Station Display Name and Station Name fields are populated, the Station Display Name will be used.
- Voicemail Number = *0 (So you can press the Voicemail button to check your voicemail)
- Short Name = A short label shown on the LCD display for line key 1, it could be your name or any other name you’d like to display.
Under "Line Key 1"
HOW TO CONFIGURE:
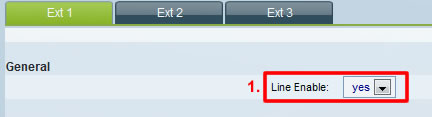
Under "General"
- Line Enable = Yes
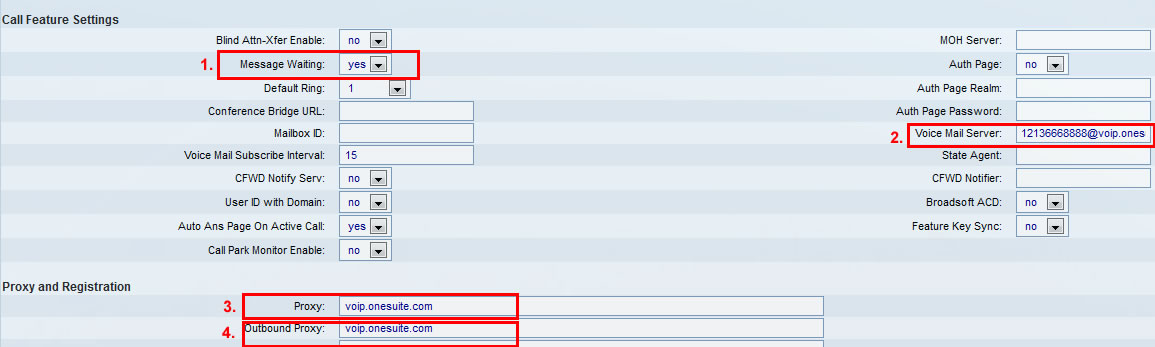
Under "Call Feature Settings"
- Message Waiting = Yes
- Voicemail Server = (Your SuiteAdvantage number)@voip.onesuite.com (i.e. 12136668888@voip.onesuite.com)
- Proxy = voip.onesuite.com
- Outbound proxy = voip.onesuite.com
Under "Proxy and Registration"
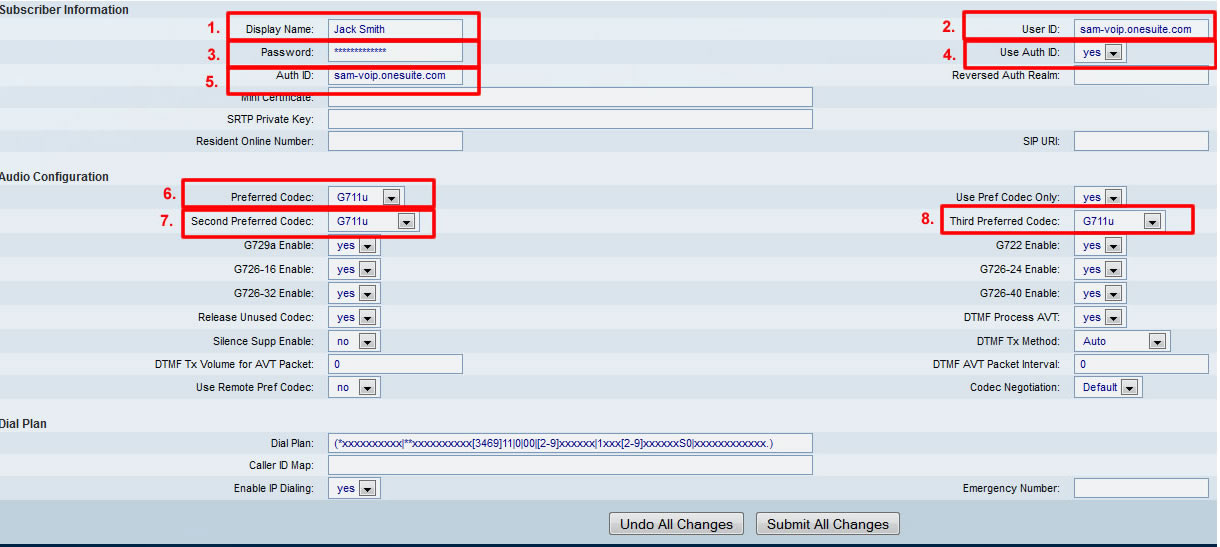
Under "Subscriber Information"
- Display Name = Display name for caller ID, you can enter your name in this box.
- User ID = Your OneSuite VoIP account ID (i.e. if you OneSuite username is Sam, please enter sam-voip.onesuite.com)
- Password = Your OneSuite VoIP password
- Use Auth ID = Yes
- Auth ID = same as User ID
- Preferred Codec = G711u
- Second preferred codec = G711u
- Third preferred codec = G711u
Under "Audio Configuration"
Before exiting the web administration pages, I recommend that you go back and review all settings and changes just to confirm that all values were entered correctly and saved. When done, scroll down to the bottom and click Submit All Changes. Your Cisco phone will then reboot and be ready for calls.
Enjoy your new Cisco IP phone!


