

Here's how:
- Log into OBiTalk.com
*New OBi users please follow the instruction at OBiTalk.com to register your device. Or refer to this blog post, “SuiteAdvantage and ATA configuration - OBi100” for device registration.
- Go to Approved Service Providers in the left menu
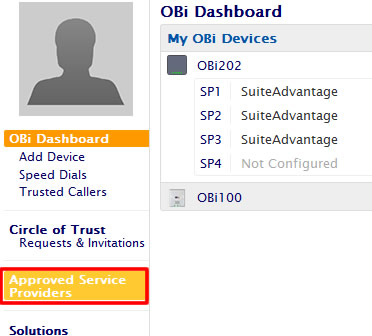
- Select OneSuite

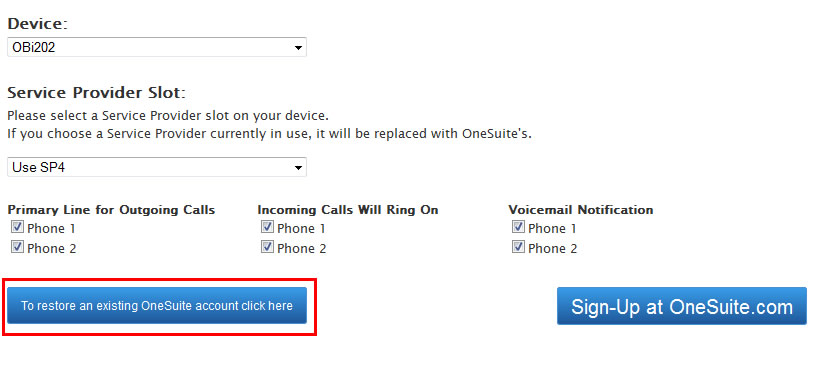
- On the OneSuite page, select the device and slot you’d like to configure
- Click “Restore an existing OneSuite account” to log into your OneSuite account
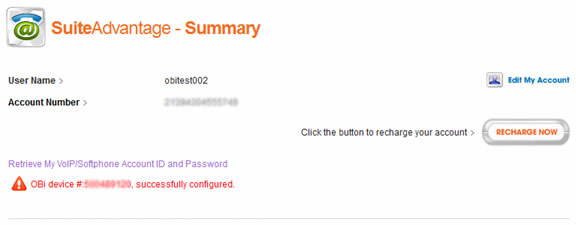
- That’s it! Your device will be automatically configured once you log into OneSuite.com. You will see a confirmation message saying “OBi device #{your device number}, successfully configured.”
All OneSuite users could follow the above instruction to automatically configure an OBi device for making broadband calls. SuiteAdvantage subscribers will also be able to receive free unlimited incoming calls and access voicemail by dialing *0 from the connected phone set.
For more information about OBi device configuration, please see our FAQ.
Don’t have an ATA?
If you don’t currently own an ATA we recommend purchasing an OBi device to use with your current phone set and take advantage of our low cost BYOD (bring your own device) service. OBi devices can be purchased at Amazon.com. Upon receiving your new OBi you can follow the above instruction for auto configuration.


